![]()
VW Golf/Jetta Vent Removal
and Lighted Vent Wiring by VW Vortex’s
London Dub
http://forums.vwvortex.com/zerothread?id=1960541
Lighted Vent Part Numbers for
early MKIV Jettas (VW Retail as of 2005):
Left
Vent - 1J1-819-703-E-2AQ - $103.22
Middle
Vent - 1J0-819-728-D-2AQ - $223.53
Right
Vent - 1J1-819-704-D-2AQ - $87.18
First off, I have to give
props to jkrew for originally posting his DIY on this install (NLA). Also thanks
to lag for helping me procure these vents.
Some have modified their
existing vents with LEDs for the same results, the
vent markings are translucent and the holes are there for LEDs-
you just have to source 12v LEDs that will work or
determine the resistor value to wire with the LEDs so
that they can handle 12v.
STEP 1 – Remove original vents
If you are removing Golf
vents - keep reading, if you are removing Jetta vents, skip to the individual
vents section.
Most people know how to
remove the vents, but there are a few tricks to help you.
Golf vents
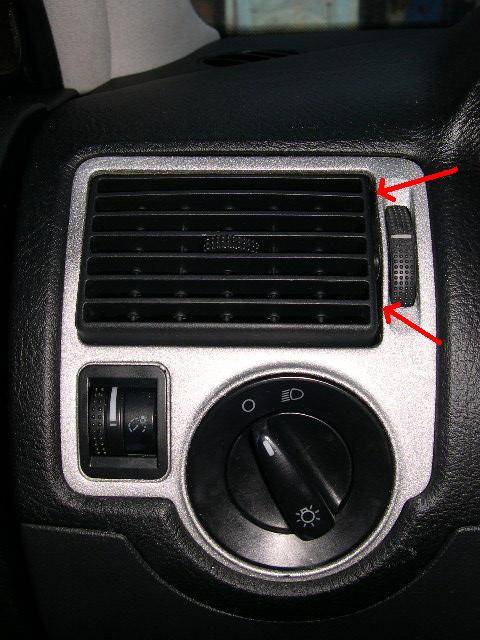
First off, all 4 vents (the
parts that move and control air flow) all come out by pushing the side with the
horizontal wheel. You might need help of a screwdriver. Take out all of these
first.
Arrows show which side to
push from.
STEP 2 - Individual Vents
Drivers side (Golf/Jetta):
1. While in the off position,
push the switch in while turning ‘on’ the switch will move to a position in
between ‘on’ and ‘off’ you may hear a click sound.
2. Pull switch
out, unhook harness.
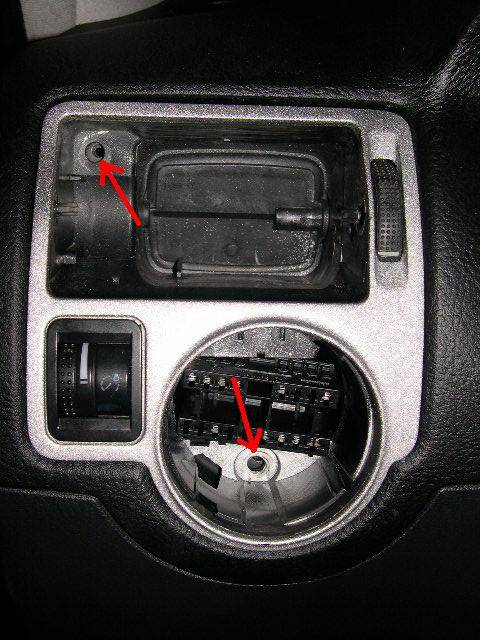
3. You should now see two
torque screws. Remove these (you can chuck ‘em, you
won’t need ‘em anymore)
Here is a shot of their
locations (I've taken them out by now)
4. Pull the vent out, and pop
off the harness to the dimmer switch, yank out dimmer switch (through the
front) and set aside with light switch.
Passenger side (Golf/Jetta):
1 There are no screws, you
just need to yank it out. You might need to really reef on it – but if you’re
like me – I didn’t really want to keep my old vents to I just gave ‘er. A putty knife can help here.
***If you are installing
lighted vents***
2. There is a little
rectangle of thin plastic that you will see once the vent is out. – left hand side.
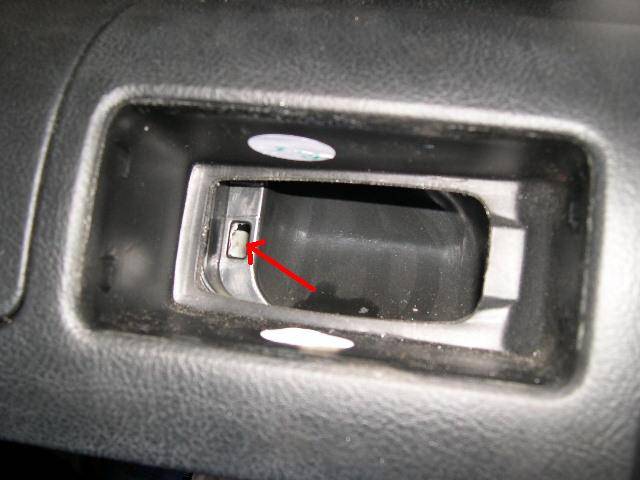
Take a flat screwdriver and
press it against the rectangle, give the screwdriver a quick forceful shove and
the plastic will break leaving you with a nice rectangular hole. This is where
you need to run your wires for the vent.
3. While you’re here, remove
the panel on the right hand side of the dash, it sits flush against the door
when closed. Pull it evenly away from the dash towards the opened door a lot
(you should hear clicking as the metal clips disengage, then back towards the
rear of the car. This piece is hard to move and you’ll most likely rip some of
the clips off of their pins once it is loose, but I didn’t break anything on
mine
Center Vent
1. Remove two torque screws
in upper corners of vents (you Jetta guys don't need to do this part, follow
steps 2-4).
2. Carefully remove all of
the buttons by prying behind them with a little screwdriver. The hazard switch
and rear defrost will be mighty hard to get off. Undo the wiring harnesses for
the witches, and store the switches in a safe place.
3. If you can’t get a switch
out, you should be able to get the whole vent out and remove them from the
rear. The top of the center vent should come out towards you a little bit, then the bottom should release itself from their clips.
Again - a putty knife can help get under the edge and help the vent out - be
careful not to damage the soft touch coating, patience is key.
4. Once out, you should be
able to pull the vents out just enough to undo the harness for any stubborn
switch, and then get the switch out. The problem with the above mentioned
switches is they are held in with metal springs that are very tough to get out.
STEP 3 - Wiring (If lighted), Skip to step 4 if
not installing lighted vents.
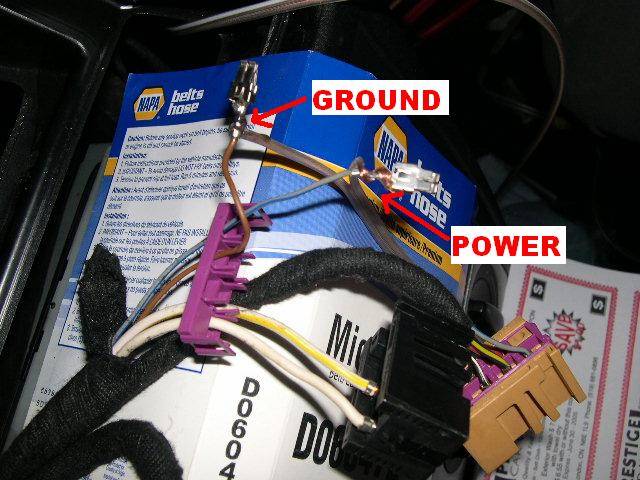
The wiring can be done many
ways, all you need to know is that the blue/grey wire is the power and the
brown is the ground. Each switch in has these two wires leading into it. All
you need to do is connect the blue/grey and brown wires from the wires coming
off the vents, to matching wires in the existing wiring. I used 20 gauge
speaker wire since it is easy to control and would
stay together while I fed the wires behind the dash. I crimped and soldered my
connections, but you could use tap ins if you wanted
to.
Wiring the passenger side:
1. Crimp about 4’ of wire to
the power and ground of the wires on the vents. I used the copper wire as my
ground and silver as power – just to make sure I didn’t mess it up (that way,
copper always went to brown and silver went to blue/grey).
2. Feed this wire through the
rectangular hole and behind the airbag to the center vent hole.
3. Slide the vent into the
hole, and pull all of the wire through. Don’t push the vent all the way in
though – just in case you need to yank it back out.
4. Leave wire there while you
work on the driver’s side.
Wiring the driver’s side:
You can do this multiple
ways. One way is to tap into the power and ground wires (Blue/grey and brown)
of the dimmer switch, and then just run the wires behind the light switch to
the wires coming off the drivers vent. Use tap in connectors or soldering. You
might not even need to extend the wires from the vent if done this way. I did a
slightly more complicated install.
1. Run a wire from the
drivers vent hole behind the steering wheel to the center vent hole. This is
tricky, since I didn’t want to remove the paneling on the driver’s side as I
did with the passenger side. However, the speaker wire I had was a little
stiff, and I was able to (with the help of my mechanic father) to feed the
wires behind the wheel between the two vents.
2. Connect the power and
ground wire from the vent wires to the speaker wire, cram everything back in
lightly (again not too tight incase I had to remove it)
Wiring the center Vents (and
everything else together)
The main reason I didn’t want
to simply tap into the wires on the driver’s side was because I wanted only ONE
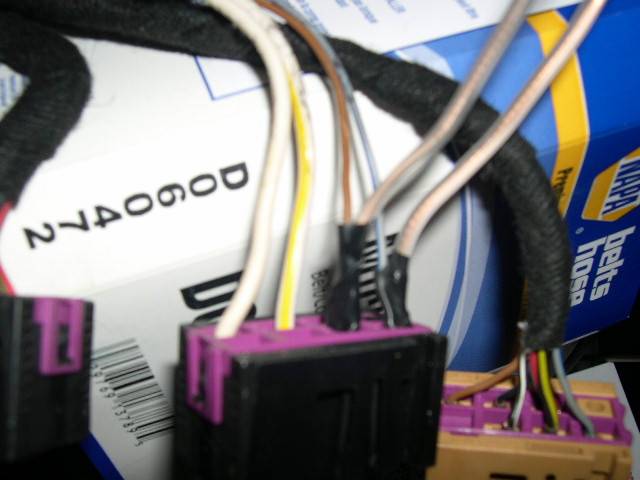
connection to the stock illumination system. What I did was locate the power
wire and the ground wire that went into the rear defrost button. I removed the
wires out of the harness by pushing the entire connection piece back through
the harness. I was left with this:
Then I wrapped a little piece
of my speaker wire to each of the wires as shown here, again with copper to
brown, silver to blue/grey, and soldered them there, wrapped them in electrical
tape, and reinserted the prongs of the wires to the harness
Next I gathered all of the
power wires from the drivers, passenger and center vents and crimped them to
the power wire I had just made off the switch. I did the same with all of the
ground wires from the vents and the ground wire off the switch. I was left with
this:
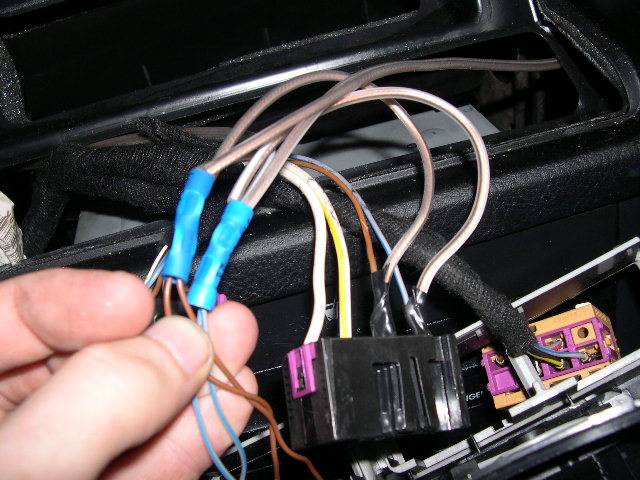
Then I just had to cram
everything back in.
STEP 4 - Cramming everything
in.
This is rather self
explanatory, however, please test the vents if you’re got the lighted ones to
make sure they are all on, and they respond to the dimmer switch too. It s a
little hard to get the center switches back in but with them strategic
placement you’ll be fine.
Here are some pics of mine
after installation:
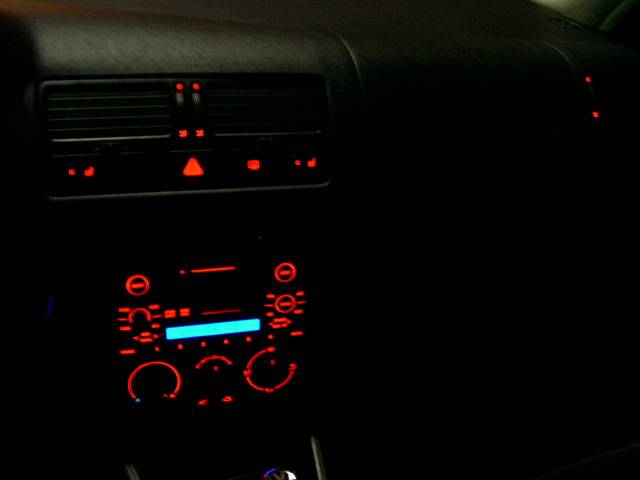
Daytime Pic:
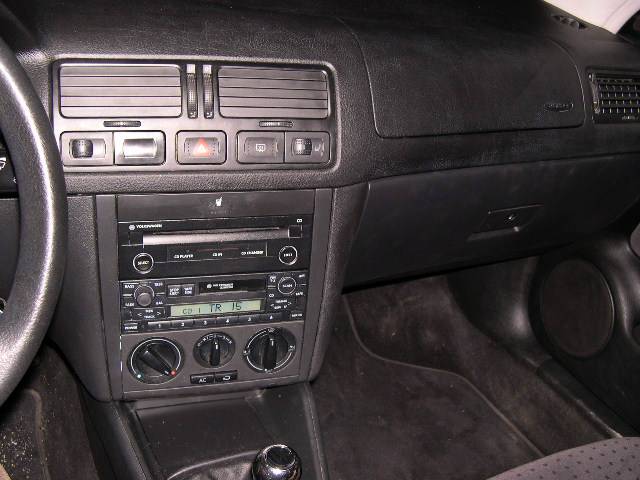
And at night: